 |
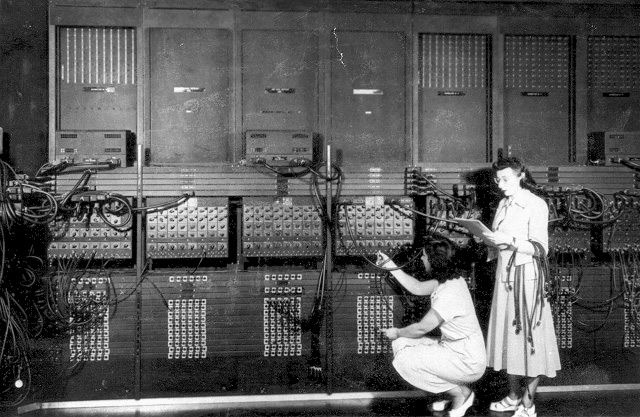
(US Army photo from ARL Technical Library) |
A. Goals
The purpose of the Encryption assignments is to gain practice with object-oriented programming, bitwise operators, number systems, and machine language. The specific goals of Part II are to:
- learn about programming in a low-level machine language
- gain a better understanding of how variables are stored and manipulated in the computer
- apply the concepts learned through Java to another programming language. Compare LFSR in Java and in TOY
- appreciate the programming and debugging advantages of a structured programming language like Java over machine language!
- get familiar with the hexadecimal number system
- use the pipe operator to redirect outputs of one program to the input of another
At the end of this assignment, you will have produced a TOY program that can encrypt and decrypt messages and images using the same algorithm as in the Java assignment. You will be able to encrypt using one version and decrypt using the other.
B. Background
 .
.
In the old days of Computer Science, high-level languages like Java did not exist yet. Programming started with bits. You are probably thinking, 0s and 1s, but did you know that they didn't even have 1s in the beginning? Punch cards were used to write and compile a computer program, in binary! The next higher level from binary is hexadecimal, which is a base-16 number system. TOY is a mock-up machine language with hexadecimal syntax and Assembly language in the comments. Assembly languages are associated with the chip architecture on a computer or phone and used by low-level system programmers. Only after that do you arrive at high-level human readable programming languages like Java. However, computers cannot read high-level languages, and they have to be translated down to machine code.
Practicing to write programs in TOY will help you understand what goes on under the hood of software programs, which usually compile into machine code for execution. The syntax in TOY is very close to the machine code that the computer actually reads.
In this assignment, you will be doing conceptually the same thing as the previous homework but in TOY instead of Java.
C. Getting started
- Download Visual X-TOY 7.3 from our web site. This version is newer and better than the version on the booksite, and will save you hours of debugging time. Be sure to read the installation instructions because you will run into most of the same security restrictions that caused problems with the introcs installer in hw00.
- Download the
skeleton
encryption.toyfile into your hw07 folder. - Download and unzip
data.zipinto your hw07 folder. If it unzips into a subfolder, move all the files up to your main hw07 folder. The zip file contains sample data you can use for testing, as well as Java programs that convert images and strings back and forth to a format that the TOY simulator can understand.
A. TOY file format
The TOY simulator supports only a very simple form of input: lists of 16-bit values written in hexadecimal. It cannot read strings or image files directly, nor can it accept command-line arguments. We have therefore defined the following format for inputting images to your TOY program, as well as programs to convert back and forth to actual image files:
Format        Example     Explanation
---------     -------     ----------------------------------------------------------------
Seed MSB      000A        Position of seed's MSB (# bits in seed - 1), must be <= 15
Seed          0342        Seed, stored in a 16-bit word (0342 is 01101000010 in binary)
Tap           0008        Position of the tap bit
Width         0258        Image width in pixels (pipe is 600 pixels wide, or 0258 in hex)
Height        01AC        Image height in pixels (pipe is 428 pixels high, or 01AC in hex)
Pixel-Hi      FF87        Upper 16 bits of pixel at row 0, column 0
Pixel-Lo      6250        Lower 16 bits of pixel at row 0, column 0
Pixel-Hi      FF8F        Upper 16 bits of pixel at row 0, column 1
Pixel-Lo      6A58        Lower 16 bits of pixel at row 0, column 1
...
Because pixels take 32 bits to represent and TOY words are only 16 bits, there are two TOY words for each pixel in the image.
B. Converting images into the TOY format
The data.zip file you downloaded contains Java
programs to convert back and forth between images and the
special TOY file format.
We provide you with the .java source for these programs. You will need to open them in DrJava and compile them before you can use them. Feel free to look over the source code. It is commented for your benefit, but it does use some syntax that we do not cover in CIS 110.
PictureToTOY image_filename seed tap output_filenameconverts an image to TOY format. You need to provide the seed and tap as well, since that information gets incorporated into the TOY input file.TOYToPicture toy_input_filenameconverts a TOY input file back to an image and displays it. You can save the image through the window's File menu. Make sure to save any images for this assignment as PNG files, never as JPEGs!
C. Converting strings into the TOY format
Representing strings in TOY – For simplicity, we will use the same file format for messages as for images. After all, encryption works on bits, and doesn't care what those bits represent. Since each character requires only six bits in our mapping, we will pack them tightly into as few machine words as possible. If that turns out to be an odd number of machine words, we will add one more, so we can pretend that each pair of machine words is one "pixel." There is one unfortunate side effect of this approach: your encrypted message may have some "garbage" characters at the end because we need to add some extra bits.
If the explanation above doesn't make sense to you, don't worry. The short version is that you can write your TOY program to encrypt and decrypt images, and it will "just work" for strings as well.
Converting strings into and out of TOY format –
The data.zip file also contains programs to
convert between strings and the special TOY file format.
They work very much like the programs for converting
images.
Once again, you will need to open the .java
files in DrJava and compile them before using them.
StringToTOY message seed tap output_filenameencodesmessageusing the same mapping you used in the Java Encryption assignment, packs the 6-bits-per-character into 32-bit "pixels", and writes it out tooutput_filenamealong with the seed and tap. It will add random "garbage" characters to the end of your message to pad it to an appropriate length!TOYToString toy_input_filenameconverts back to a string, and prints it out.
encryption.toy
Your task is to write a TOY version of your Java
encryption program. We do not expect you to break your
code up into functions, let alone distinct objects in TOY.
Instead, you will effectively
smoosh Encrypter.encrypt(), LFSR.nextBit(),
and PictureEnryptable.encryptNextBit() into
one program. Review these methods from hw06 before starting on your
program.
Don't forget to save and BACKUP YOUR CODE REGULARLY!. Unlike DrJava, Visual X-Toy does not automatically save your file, even when you switch from Edit to Debug mode. You should also submit regularly and make frequent backups of your code (include the date and time in the filename when you back it up so you can keep track of the versions). It is unbelievably easy to accidentally make a change to your code that breaks everything, and being able to retrieve old versions will be a huge time-saver. You also really don't want to have to start from scratch when your computer crashes.
A. Your program
Your encryption.toy should output the
encrypted image/message in the same format described in
the previous tab. That way you can feed the encrypted
output back into your program to decrypt it.
The encryption.toy
skeleton contains pseudo-code outlining the algorithm.
You are welcome to try and find better or simpler ways to
implement the program, but TAs will only be able to
help you with the algorithm described in the
pseudo-code. If you want to try and be clever, you
will be on your own.
Error Checking – Do not do any error checking. Assume that the input files to your TOY program are always valid, and always contain at least two machine words of data. (In other words, your program does not have to handle empty strings or images.)
B. Running your program
Use Debug Mode to run your program.
Simulation speed – By default Visual X-Toy runs your program quite slowly so you can watch what is happening. For very simple tests and debugging this is pointless since you are better off stepping through the program instruction-by-instruction. For longer tests, it is too slow to be useful. We therefore suggest that you speed up the simulation.
In Debug Mode, click "Change Settings..." next to the Refresh Rate at the bottom left of the window. Reduce the target clock period to a small number (try 10ms), and leave the Refresh Rate at 1 spr. For large tests you may well need to modify these further, although we also provide you tools to simulate faster through DrJava.
C. Debugging
Debugging TOY programs is much more painstaking than debugging Java programs. You will need to use very simple test cases (see below), and step through your code in Debug mode. You will also need to work very, very methodically. Never, ever assume an instruction is correct, nor that it does what you expect. Most bugs in TOY programs are either typos or very subtle. At every step:
- Make sure the program counter
PCis set to the memory address you think it is set to. Do not trust the outlined line of code – there are cases where it will be inaccurate. - Make sure the contents of the PC's memory address in
the Memory section of the Core tab
matches what you wrote in your program. TOY executes
whatever is stored at that location in memory, which
may be different that what you wrote. (It is
possible for you program to overwrite itself in memory
while it is running.
encryption.toyshouldn't do this, but it could happen if you have a bug.) - Did you accidentally skip from memory
address
19to memory address20? Don't forget about memory addresses1A–1F! This is the most common bug we see in office hours. - Ask yourself what the next instruction is supposed to achieve. Then look at the instruction that is about to execute and ask yourself what it actually does. Never assume an instruction does what you planned or think it does. Any typo in your instruction will cause it to misbehave; very few typos cause syntax errors that prevent your program from running.
- Write down what register or memory address the instruction will modify (if any), and what the new value will be. Do this by hand before you execute the instruction.. Make sure that both the destination and value are what you expect them to be based on what the instruction is supposed to achieve. Cross-check the destination with your register map.
- When you are convinced your program is about to execute the instruction you think it is about to execute and that the instruction achieves what you expect it to achieve, step one instruction. Monitor which register value or memory address changed (instructions can only modify a single register or a single memory address, never both). Cross-check the changes with what you wrote down in the previous step. If there are any discrepancies, figure out why. If you need fix your code, switch back to Edit mode, make the change, save your changes, and start the debugging process over from the beginning. Don't forget to back-up and submit regularly. (Submitting your code regularly gives you and extra layer of code backups, and also makes it much easier for us to help you on piazza and in office hours.)
D. Smaller test cases
zeros.in – This is a simple test case
included in data.zip. Its output should
match zeros.out, also included. It consists
of 20 machines words that are all zero, arranged as a
5×2 "image." The seed is 01101000010
and the tap position is 8. Because all the
message bits are zeros, the output should be the sequence
of bits that would be generated by repeatedly calling
LFSR's nextBit() method.
You should be able to work out a sequence of these bits
by hand in addition to referring
to zeros.out. You will find it helpful to
write out the bit sequence for the first few machine words
of zeros.out in binary. As you step through
your program, make sure the random bits you are generating
match this sequence of bits. Once you are certain you are
generating the right sequence of bits, make sure you are
assembling them into machine words correctly.
To debug with zeros.in, it is easiest to
click "Open..." on the StdIn tab while in Edit Mode to
load the file. If you load it through the StdIn tab while in
Debug Mode, you will need to reload it every time your test
your program.
ones.in – This test case is identical
to zeros.in except that all the bits are ones
instead of zeros. The reference output is provided
in ones.out and is the complement
of zeros.out (i.e. all the bits are flipped).
Use this test case once you handle zeros.in
correctly to make sure you are encrypting the message
bits, not just spitting out the LFSR output.
A clever (but broken) optimization – The
pseudo-code we provide includes a quadruple-nested loop over
all rows, all columns, two words per pixel, and 16 bits
per word. Nested loops are no big deal in Java, but they
can be difficult to keep track of in TOY. However, three
of these loops – over the rows, columns, and 2 words
per pixel – are just counting up the number of machine
words to encrypt. Why not replace all three with a single
loop that
runs width * height *2 times?
In theory this would work, it is a little simpler to
write, and will probably execute slightly faster on any
modern computer. It's a really good idea. There
are two problems with this in TOY though. First, you
don't have a multiply instruction, so it takes a little
bit of work to compute the product. Second, you need to
be able to store the total, which is twice the number of
pixels in the image, in a register. Since TOY registers
have only 16 bits, the largest number you can store is
65,535 (FFFF in hex). Of course, most images
have far more pixels than this, so the total usually will
not fit in a single register. Keeping track of a large
number split across two registers turns out to be much
more complicated than writing a quadruple-nested loop.
It's best not to try. (Digression: One of the first
programs Dr. Brown wrote for a company was an image viewer
that ran on Windows 3.1. Windows 3.1 was designed to run
on the Intel 80286 processor, which had 16-bit words just
like TOY.)
Do not try any larger tests
until zeros.in and ones.in are
working!
Simulation Speed: Visual X-Toy is not the most convenient interface for encrypting large messages or images. It will also be ridiculously slow unless you reduce the clock period to a very low number and increase the refresh rate to a larger spr. Still, a better way to run your program once you are confident it works is with the tools below:
TOYEncryptString.javais included indata.zip. You will need to compile it in DrJava. It takes the name of your TOY program, the message to encrypt, the seed, and the tap as command line arguments, converts the message to the TOY input format (usingStringToTOY), runs your TOY program on it, converts the output back to a string, and prints it out. It also strips off the random characters that got added to the end of your message to pad it out to a multiple of 32 bits. For example,java TOYEncryptString encryption.toy ARVIND_IS_AWESOME 01101000010 8should print out3C$2X;=8A[5:I64=Rif you implementedencryption.toycorrectly.TOYEncryptImage.javais also included indata.zipand makes it easy to encrypt/decrypt images using your TOY program. Start by testingjava TOYEncryptImage encryption.toy white-10x10-01101000010-8.png 01101000010 8should display a 10×10 white image. If that works, you can start playing with other images including pipe.png. Remember that your seed must be at most 16 bits long.TOY.javais the command-line TOY simulator that these programs use to run your TOY program. We also use it for grading. You can also run it yourself:java TOY program.toy stdin.txt. Replaceprogram.toywith the name of your TOY program file andstdin.txtwith the file containing the input your program should read (in the same format that Visual X-Toy uses). Be aware thatTOY.javaprints lots of output. First, it prints a list of all instructions it finds in your program file. Next it prints a core dump (contents of all registers and memory) before your program runs. After that comes the output printed by the program (this is the "Terminal" section). Finally, it prints out a core dump after your program halts.
java.util.NoSuchElementException: When you test
with the tools above (or when you use our submission
tests), your program may crash with
a java.util.NoSuchElementException. This
means that, instead of halting, your program is attempting
to read input past the end of your input file (the
message, image name, or stdin.txt file,
depending on which tool you are using). Visual X-Toy
simply pauses and waits for you to enter more input into
the StdIn tab, which looks very similar to the program
halting. Go back to debugging zeros.in
and ones.in in the Visual X-Toy debugger, and
pay extremely close attention to the program counter.
Make sure you program is actually halting when it is done
encrypting bits, and not waiting for more input.
Before starting on the extra credit, make absolutely certain that your program works, and that you have backed up the working version!
Shorten your program to use as few non-zero words of
memory as possible. The halt instruction
(0000) does not count in the total since it
is 0. You will receive a point of extra credit if your
(working) program uses at most thirty-five (35,
base 10) non-zero words of memory. We will also have a
prize for the shortest working implementation.
A. Readme
Complete readme_toy_encryption.txt
in the same way that you have done for previous assignments.
B. Submission
Submit encryption.toy and readme_toy_encryption.txt
on the course website.